Wednesday, October 3, 2012

Gluten-Free Cornbread

Hi All!  I know it's been a while since I posted.  Honestly, there hasn't been much time for diversion lately! Nevertheless, we had a great fall meal last night with some friends and I promised to share the recipes.  The meal included chili, cornbread, and a pumpkin gingerbread trifle which was so yummy!

We'll start with the cornbread :)  The cornbread is gluten-free, although we had a moment of uncertainty (research via Google shows that white vinegar, when distilled, is indeed GF.  Yay!) I especially love the real corn added into the recipe - makes it have a great texture. My recipe comes from here.
Yum.  Doesn't that look delicious?
Ingredients:
1 c. milk
1 tbsp. distilled white vinegar
2 c. cornmeal
2 tbsp. baking powder
1 tsp. salt
1/2 tsp. baking soda
1/4 c. + 2 tbsp. sugar or sugar substitute
1 1/2 c. corn (canned or frozen work great)
2 tbsp. canola oil
1/4 c. applesauce

First, preheat your oven to 420F.  In a small bowl, combine the milk and vinegar, stir, and set aside.  This is basically creating your buttermilk that's typically used in cornbread.  Meanwhile, in a large bowl, combine all the dry ingredients: cornmeal, baking powder, salt, baking soda, and sugar.  In a medium-sized bowl, combine the corn, applesauce, oil, and milk/vinegar mixture.  Add the wet ingredients to the dry ingredients and stir until everything is moistened.

Pour the mixture into a greased 8x8 pan.  Cook for about 25 minutes and let cool.  The directions I had recommended letting cool for 15 minutes before removing so it doesn't get crumbly.  I waited at least 15 minutes and it was still a tad crumbly, but mostly held together.

That's it!  Enjoy!

Thursday, July 26, 2012

A long time coming

So, months before my sister-in-law married my now brother-in-law, I decided to make them a blanket.  I've done it before, I had lots of time off, so I could get it done in plenty of time, right?

Wrong.  Okay, it was a bigger project than anticipated.  Totaling more than 100 hours of work, I didn't realize how nit-picky it was going to be.  But it was SO worth it.  Trust me.

The instructions came from here, though I tweaked the colors to match their bedroom style.  It's like the wedding ring quilt that I've seen in a lot of homes made by quilters, but crocheted instead.

Ready?  Really, sure you're ready? (p.s. a disclaimer: The bride and groom haven't yet received or seen this gift, and I've hidden the post on Facebook from them, so Mum's the word!!)


Here it is!!

The quilt is actually twice this size, so big enough to lay on a full/queen bed or to use for the couch, or whatever!!

Friday, May 25, 2012

Small victories...

Hi again friends...  our housewarming deadline is looming - tomorrow!  That, coupled with the fact that I was hired to be a nanny for the summer this week (yay!), gives me just one more week of being a Suzy Homemaker.

We had a couple of small victories this week that I'm especially excited about, and wanted to share with you!

First up, our bathroom.  The bathroom had one towel rod, which left us wondering how the both of us would hang our towels and have them successfully dry!  We found this double towel rod at IKEA and my dear husband put it up yesterday!

Also, in the bathroom, a better version of my make-up storage.  I had the same board at the old apartment - it's just a magnetic dry erase board covered with drawer liner.  The make-up has magnets on the back that hold it up.  The rest of the things that are too heavy or misshapen to be held up are in the little bin below.  I found this treasure in the dollar section at Target - one of my favorite sections!

 Finally, I re-purposed the towel rod that had originally been in the bathroom (nothing goes to waste around here!).  I saw this on Pinterest, but I can't remember where, otherwise I'd give credit!  Anyway, my jewelry was still boxed up from the move, and this towel rod in the bedroom motivated me to get it out and organized!


Those are my small victories for the week!  More on the housewarming party after it's done!

Monday, May 21, 2012

Home Sweet Home

Hello again, dear friends!  We finally posted pictures of the place!  Click on the picture to see our Facebook album of our new place :)

Which reminds me - if you're in the area of the Twin Cities this weekend, you're invited to our housewarming party!  You can see the official invite here and RSVP if you'd like, or just let me know you're coming :)
More later on cooking and crafting, but for now, enjoy some pictures!

Friday, May 18, 2012

Highlights

I know it's been a long time since I posted, and my to-do list is looming in my head, so I will be brief :)

Here are some highlights from the last while, along with some things I may be posting soon:

- We moved into our house on May 5th!

- I finished my first year of the MSW program

- I tried out new recipes:

  • Whole Wheat Banana Blackberry Chocolate bread
  • Crescent roll pizzas
  • Mexican-style pizza
- Our housewarming party is scheduled for May 26th - if you live in the area or will be in the area, you're invited!

- My internship fate for next year has been excited, and I got my first choice, a non-profit that works with the Spanish-speaking population in the Twin Cities!

I'm sure there's more I'm forgetting, but recipes, house pictures, and tales will be posted soon.  I have no excuse as of right now, with no summer job, no classes, and no internship obligations!

Tuesday, April 17, 2012

Tasty TUESday: Chicken Alfredo Pizza

I'm switching to Tuesday, folks, because I have more time on my Tuesdays at this point. It maintains the alliteration, and aids my schedule!

Ever make something expecting to have leftovers, and then you don't?  This was one of those meals.  This makes a smallish-sized pizza (probably about 9" diameter), though you could make a bigger dough and just multiply/adjust the recipe as needed.

This was good pizza.  It looked and smelled so good, my husband actually asked, "Do you want to take a picture of this first?" You could also add more veggies to this pizza and make it even tastier - our pantry was running low on fresh veggies!

Ingredients:
Bisquick*
4 tbsp egg subsitute
2 tbsp water
1 tsp. garlic powder
flour
1/2 c. alfredo sauce
1 tbsp Olive or Canola oil
1 chicken breast
8 ounces diced tomatoes (drained and rinsed, if canned)
1 tsp chili powder
Basil
1/4 c. shredded cheese

* I made my crust from the Bisquick recipe, but you could also make any pizza-style crust and then go from there.

Preheat oven to 400F.

To make the crust, combine Bisquick, egg substitute (or egg), garlic powder, and water.  Dough was sticky, so I had to use flour to press it onto the greased pan.  Spread olive/canola oil on the crust.  Cover the dough with Alfredo sauce.

Precook the chicken breast and cut up into small pieces.  Toss the chicken with chili powder, then add to pizza distributed evenly.  Distribute tomatoes evenly, also.  Sprinkle cheese and basil over top the pizza.

Bake at 400F for 18-20 minutes, or until crust is crispy and cheese is melted.  Enjoy!!

Thursday, March 15, 2012

Tasty Thursday: Mexican Lasagna

Yum.  I love lasagna.  And I love Mexican food.  And my husband loves Mexican casseroles.  Mix it all together, and you've got Mexican lasagna!  I initially pinned the idea from this blog on Pinterest, and decided that I could take the general idea and make it within my "healthy" parameters.

The recipe I made serves 2 easily (3 if you're eating lighter). 1/2 receipe: 695 calories, 13 g fat, 102 g cabs, and 48 g protein.

Use a loaf pan and preheat your oven to 400 degrees.  Grease the loaf pan with canola spray or something similar.

Ingredients:
2 small corn tortillas (the kind that are 50 cal each)
1/4 reduced fat mozzarella cheese
1 cup black beans
1 cup frozen corn
1/2 c. Prego italian sauce, "Healthy" (a new type they make -yay!)
3 ounces ground beef (85% lean or higher), browned
1 can (about 2.5 cups) red kidney beans
1 tsp. garlic powder
1 tsp. chili powder
1 tsp. paprika

After you've browned the ground beef, combine all ingredients except tortillas and cheese.  Layer the ingredients in this order:  mixture, tortillas, mixture, tortillas, mixture, cheese.

Bake at 400, covered, for 30 minutes or until warmed through and cheese is melted on top.

This recipe is great to make-ahead and then throw in the oven when you get home.  If you do so straight from the refrigerator, cook for longer than 30 minutes (probably 45-60) to heat through.

Voila!  My husband helped cook it after we got home from a long day, and served it up more casserole style. Nonetheless, it was delicious!  It would be great with tortilla chips if you wanted to add those in, as well.

Tuesday, March 13, 2012

Our house.. in the middle of the street...

Things have been happening over here. First, let me get it out -  We're buying a house!!!
It's been a whirlwind few weeks.  About 5 weeks ago, we decided that instead of moving into yet another apartment and dealing with landlord frustration and short-term living, that it was time to look into our options. As we discovered that it was indeed an affordable alternative, plus all kinds of other benefits, like owning your own place, paying money toward owning something, doing what you want with a space, and bigger space, we decided to take the plunge.

So, after a first time home buyers' seminar, meetings with the mortgage lender, and jam-packed outings to houses that were in no way what we were looking for, we found it.  And we made an offer.  And the offer was accepted!

So, with the full disclaimer that we're still in between the accepted offer and closing, we are so excited!  Our next steps include a home inspection, an 8-hour Saturday class, lots of little details, and then we close at the end of April!

We're just so excited, we had to share.

Thursday, March 1, 2012

Tasty Thursday: Baked Mozzarella Sticks!

Love mozzarella sticks, but don't want to have to go out to get some?  Wish they weren't so greasy from the fryer? I found this recipe online (from Gina, who else?) and had to try it!

Here's what you need:
4 sticks string cheese
1/2 c. bread crumbs
1/4 c. flour
2 eggs (or egg substitute!)

To start, cut your string cheese sticks in half.  Put them in the freezer.  By freezing your sticks, they'll be more rigid, and they'll cook up better in the end. When they're frozen, take them back out.

Put your flour, egg, and bread crumbs in three separate bowls.  Dip the sticks in flour, egg, and then bread crumbs.  Make sure to shake off the excess egg before you go into bread crumbs, otherwise you'll end up with a crumby mess!

When all of your cheese sticks are covered, put them back in the freezer until you're ready to bake them.  If you don't do this, your cheese will melt increasingly faster than your bread crumbs get all nice and crispy.

Bake at 400 on a baking sheet.  Bake 4-5 minutes, and then turn and bake another 4-5 minutes. Again, watch closely to ensure they don't melt away, and then they'll melt in your mouth!  These taste great with tomato or marinara sauce, too :)


Tuesday, February 28, 2012

Christmas Crafting

 So, today I though I'd share with you a craft I made for a Christmas gift at the end of last year.  We were gifting on a budget, so Pinterest became my inspiration.

You can see the two collages that I made to the right for my mother-in-law.  The craft is pretty self-explanatory, but I thought I'd include a few tips I learned in the process.

First, if you're going to mod podge pictures you've printed on your printer, then make sure you spray them with a clear sealant first.  That way the ink won't smear when you start putting mod podge all over it.  I also recommend Mod Podge for paper - there are multiple types, so pick this one if this is the main project you're working on.

Also, I learned that mod podge takes a LOOOONG time to really dry (cure?) before it's not sticky or tacky. Make sure you let them dry for a while before you stack, wrap, or cover them with something else.

One more thing - the more coats, the better!  I did 2 coats a day for probably a week, which was an easy way to build up layers and know that it would be better quality.

That's all I've got!  Coming up, I've got superhero coasters, a crocheted hat, and cooking something up for tasty Thursday :)

(p.s. - if you want detailed instructions on making this craft, just let me know and I'll post some!)

Thursday, February 23, 2012

Tasty Thursday: Stuffed Zucchini

Hello friends! Today's tasty recipe comes to you from SkinnyTaste.  I've recently discovered this website and Gina has a lot of great recipes that taste good and are good for you, too!  I was inspired by her Turkey Stuffed Zucchini recipe and modified it slightly to fit my pantry and tastes.  

We had this for our Valentine's Day dinner.  It was a bit involved, so I wouldn't recommend adding it to your daily arsenal, but it is tasty for special occasions!  

Here's your nutritional information:  1 half, stuffed: 241 calories, 298 mg sodium, 9 g carbs, 23 g protein

Ingredients:
2 medium zucchini
1 tsp butter (or butter substitute)
1/2 c. finely diced onion
3 cloves garlic
1 oz. white wine
10 oz 85% lean ground beef
1/4 c. egg substitute
1 tbsp. grated parmesan cheese
1/2 c. beef or chicken broth
1 slice low calorie bread (like Village Hearth)*
1 tsp. paprika
1 tsp rosemary
1 tsp garlic powder
1 tsp marjoram
1 tsp basil
salt and fresh pepper

*You can also use bread crumbs.  I use a slice of frozen bread that's low calorie and turn it into bread crumbs, using a food processor or hand blender.  I have yet to find bread crumbs with as low of a calorie count as my own invention.

I always use my Vidalia Chop Wizard when I'm chopping vegetables - it saves my fingers and time!  If you don't own one, I highly recommend getting one!


Preheat your oven to 400.  Cut the zucchini in half and hollow them out like boats, leaving about 1/4" edge.  Chop the scooped out zucchini into smaller pieces.


In a frying pan, melt the butter and add in onions and garlic.  Cook on medium-low until onions are cooked through.  Add in zucchini and a bit of salt, cook for another 3 minutes or so.  Add wine and cook until the wine has reduced.  Add in ground beef, season as necessary.  Cook until beef is cooked through.  Add in the remaining spices and cook for at least another minute.

When your mixture has cooled (or at least, stopped being so hot!), add the Parmesan and egg substitute, and mix well.  Fill the hollowed out zucchinis with your mixture, pressing down as necessary.  Sprinkle with bread crumbs.


Pour broth into the bottom of your baking pan and then place zucchini in.  Cover pan with foil and bake 35 minutes.  Zucchini walls will be flexible and mixture will be heated through.

Makes 4 servings.

Enjoy! Even my hubby, who's not a huge fan of diverse vegetables, gave these a try and enjoyed them!  Plus, they really are filling - I thought I'd eat 2 for dinner, but was full after one and a side!

Monday, February 20, 2012

Still Fighting It...

Hi there.

I'm still here.  Promise. In fact, I have thoughts about blog posts I want to do this Thursday.  I made yummy stuffed zucchini for our Valentine's day celebration, and I want you all to enjoy its yumminess.

That said, the start to the semester has been busier than I anticipated, so that means that I've kind of slacked off in the blog realm of things.  I'm coming back.  Also to come, a gatsby-style crocheted hat.  I'm pretty proud of it.

The biggest reason I've been away is because my grandfather passed away in January.  We called him Granddaddy, and he was like a grand daddy to me.  I'll always remember his style, his laugh, and his joking around.  His sense of humor will stick with me forever and I hope one day to tell my kids (that will come one day) about the reason that I recommend putting mayonnaise in your hair.  Or why I love the harmonica so much.  Or even why we play so much Up and Down the River.  It's because of him.

So, I leave you with promises of blogs about creativity soon.  And a pictures of my Granddaddy.

My grandparents immigrated from Holland in the early 1950s

 They came to visit often!

 On their 40th wedding anniversary (they were married 60 years!!)

He always looked like he was up to no good....!

Thursday, January 5, 2012

Technically Tasty Thursday: Cinnamon Stick Wreath

I went on hiatus last week.  Mostly because Thursday was filled with travel time between my parents' house and meeting up with my husband once again.  I was otherwise distracted.

But I'm back, and have been spending the week finishing my "to-do" list around the apartment (which, of course, includes using the AMAZING vacuum we received for Christmas this year!)

Anyway, I haven't cooked anything earth-shattering lately, because, honestly, my New Year's resolution is to lose some weight, and I haven't found any good ones to try out yet.  And I've been avoiding the Food & Drink page on Pinterest because it's just too tempting.

But cinnamon is a food, so I figure, here's my Cinnamon Stick Wreath that I made right before Christmas.  I'd seen lots of pictures, but no tutorials, so I just gave it a shot!:
You Need:
Styrofoam Wreath form
Cinnamon sticks (I used 2.5 bags from Michaels)
Ribbon
Hot glue + hot glue gun

It's pretty simple. I glued 2 layers of cinnamon sticks around the wreath.  You could get a bigger form and more sticks for a bigger effect.  After the 2 layers, I filled in the gaps where I could still see the Styrofoam underneath.  Then, wrap the ribbon around the top and tie a bow, and hang! I used the removable hook "stickers" that come with the hooks to hang on the door.  It's done!

Thursday, December 22, 2011

Tasty Thursday: Crockpot Chicken Parmigiana

Yum.  I love Chicken Parmigiana.  And when it's in the crockpot, I love it even more.  This recipe does require a bit of prep work, but I promise it's worth it!


The recipe originally come from a website I found with a treasure trove of crockpot recipes.  I modified it a bit, though, to suit our pantry and needs.  
So, you start with a crockpot.  Ours has been lovingly used and abused to the point of the knob falling off.

Ingredients:
3 chicken breasts
1 egg
1 tsp salt
1/4 tsp pepper
1 c. bread crumbs
1 1/4 c. butter, melted
1 can (10.5 oz) pizza sauce
1 can diced tomatoes
1 c. shredded mozzarella cheese
Parmesan cheese
1 box pasta  
The original recipe only called for a can of pizza sauce.  A few nights before, my hubby accidentally opened a can of diced tomatoes instead of what we were really after.  So I added it in and it worked out just fine. If you like a saucy dinner (other than your own attitude, that is!), then I'd recommend adding in even more sauce.

Okay, so, cut your chicken in half, especially if they're big.  If they're smaller, use a few more chicken breasts.  This isn't an exact science, so just use some chicken.  Beat the egg, salt, and pepper together.  Dip the chicken in the egg mixture, and then in the bread crumbs.  Put the chicken into a saute pan in the butter (you could cut out the butter if you want it to be healthier, but it got so nice and brown and delicious!).

Saute the chicken.  It doesn't have to be cooked all the way through, but at least brown the outside, get it a little crunchy, etc.  I let it simmer 5-10 minutes while I did the dishes.  When that's done, move the chicken into the crock pot and pour the sauces over top.

Cook on low 6-8 hours or high 3-4 hours.  Cook shorter if your crockpot runs hot, like ours does.

When it's basically done, sprinkle the mozzarella on top and boil up some pasta.  Add Parmesan on top if you'd like.

Eat!  We had it with our pull-apart dinner rolls and had enough leftovers to come back to multiple times. 

Chicken Parmigiana Rating via Hubby: 8 or 9 (and my own personal note is that he ate it for leftovers frequently, which is always a good sign!) 

Thursday, December 15, 2011

Tasty Thursday: Pull-Apart Dinner Rolls

I've decided to dedicate Thursdays to tasty things.  Because I like tasty things much more than un-tasty things.

Anyway, today's recipe is some fabulous pull-apart dinner rolls.  They came to me through Pinterest and Amanda's Cookin.  She deserves the credit, because they're fabulous.


Here's what you need:
1 package quick-acting active dry yeast (2 1/4 tsp)
1 1/3 cup milk, warmed (roughly 105-115 F)
3 to 3 1/2 c flour (white or wheat work fine)
3 tbsp oil (Amanda calls for olive oil, but I've been using Canola just fine)
1 tbsp sugar
1 tsp salt
1 tbsp (or more) melted butter
coarse salt

Dissolve the yeast in warm milk and sugar.  Stir in 1 c. flour, the oil, and salt.  Beat until smooth, then stir in enough remaining flour until soft dough forms.  Cover and let rise in warm place until doubled, usually about 45 minutes.

Heat oven to 400F.  Punch dough down in center and fold over a few times to remove the air from the dough.  Spray a 12-cup muffin pan with cooking spray.  Divide the dough into 12 equal parts.  For each part, divide into thirds and roll each section into a ball.  Place 3 balls per muffin cup.  Brush rolls with melted butter and sprinkle with coarse salt.

Bake 15 minutes or  until rolls are golden brown.  If you choose not to use butter rolls may not turn brown on top, but they'll still taste just as good.  Cool the rolls on a wire rack and store loosely covered.

I never get sick of making these rolls, and they don't last long in our house.  I've asked my dearest husband to rate the food I make so I can give you an idea. It's a scale of 1 to 10, 1 being "Please, don't even try this again" and 10 being somewhere around "I want seconds!"  (My husband eats like a bird.  If he wants seconds, it means the food is good.  I mean good.)


Rolls Ratings:  "Can I give it an 11?"

Sunday, December 11, 2011

Jesse Tree

So, this year, we decided to make a Jesse tree.  It's somewhat like an Advent calendar, though more historical in nature, working from Jesse and the genealogy up to Jesus' birth.  We thought it sounded like a  great way to truly anticipate Christmas... and a good tradition for us to start!  The main idea is you have a tree, read a daily devotional, and then put up ornaments day by day that are based on the devotional.

I heard about the Jesse tree from Ann Voskamp's blog, A Holy Experience.  She sends out daily e-mails which I love reading and inspire me on days when I need it.  I'm also slowly working through her book, One Thousand Gifts - maybe I'll get to finish it over this Christmas break - that would be lovely.

Anyway, onto the Jesse tree.  We were trying to come up with the best choice for a tree, since we're in a small space and barely had room for a Christmas tree, which can't handle 25+ ornaments hanging from it.

So, to Target we went, and found a wall decal tree for just under $15, which seemed reasonable.  It's supposed to be removable, so we'll see if that's true.  Either way, we like it.  And if it doesn't hold up, we'll come up with a new plan next year.

Here's the tree, put onto our wall. Nick and I had to do this together, and it was slightly more time consuming than I'd expected.  Either way, I really love how it turned out, plus it's a nice change from the quilt we'd had hanging over our bed.

Next came the ornaments. The devotional for the Jesse tree from Ann Voskamp came with ornaments to print and cut out.  So that's what I did - printed on brown card stock, cut them out, labeled them on the back with the dates so I didn't get confused.  But then, I realized if we want to use these year to year, it would really be best to laminate. So, after multiple trips to Target and consequently forgetting to get laminating sheets, they were finally laminated.

Sheepishly, I confess that we should have started our ornaments on November 30th, but they weren't all laminated until December 9th, so the tree became suddenly filled all at once.

Here's the tree with the first 10 or so ornaments.  We just put them on with masking tape and will fill as we go.  


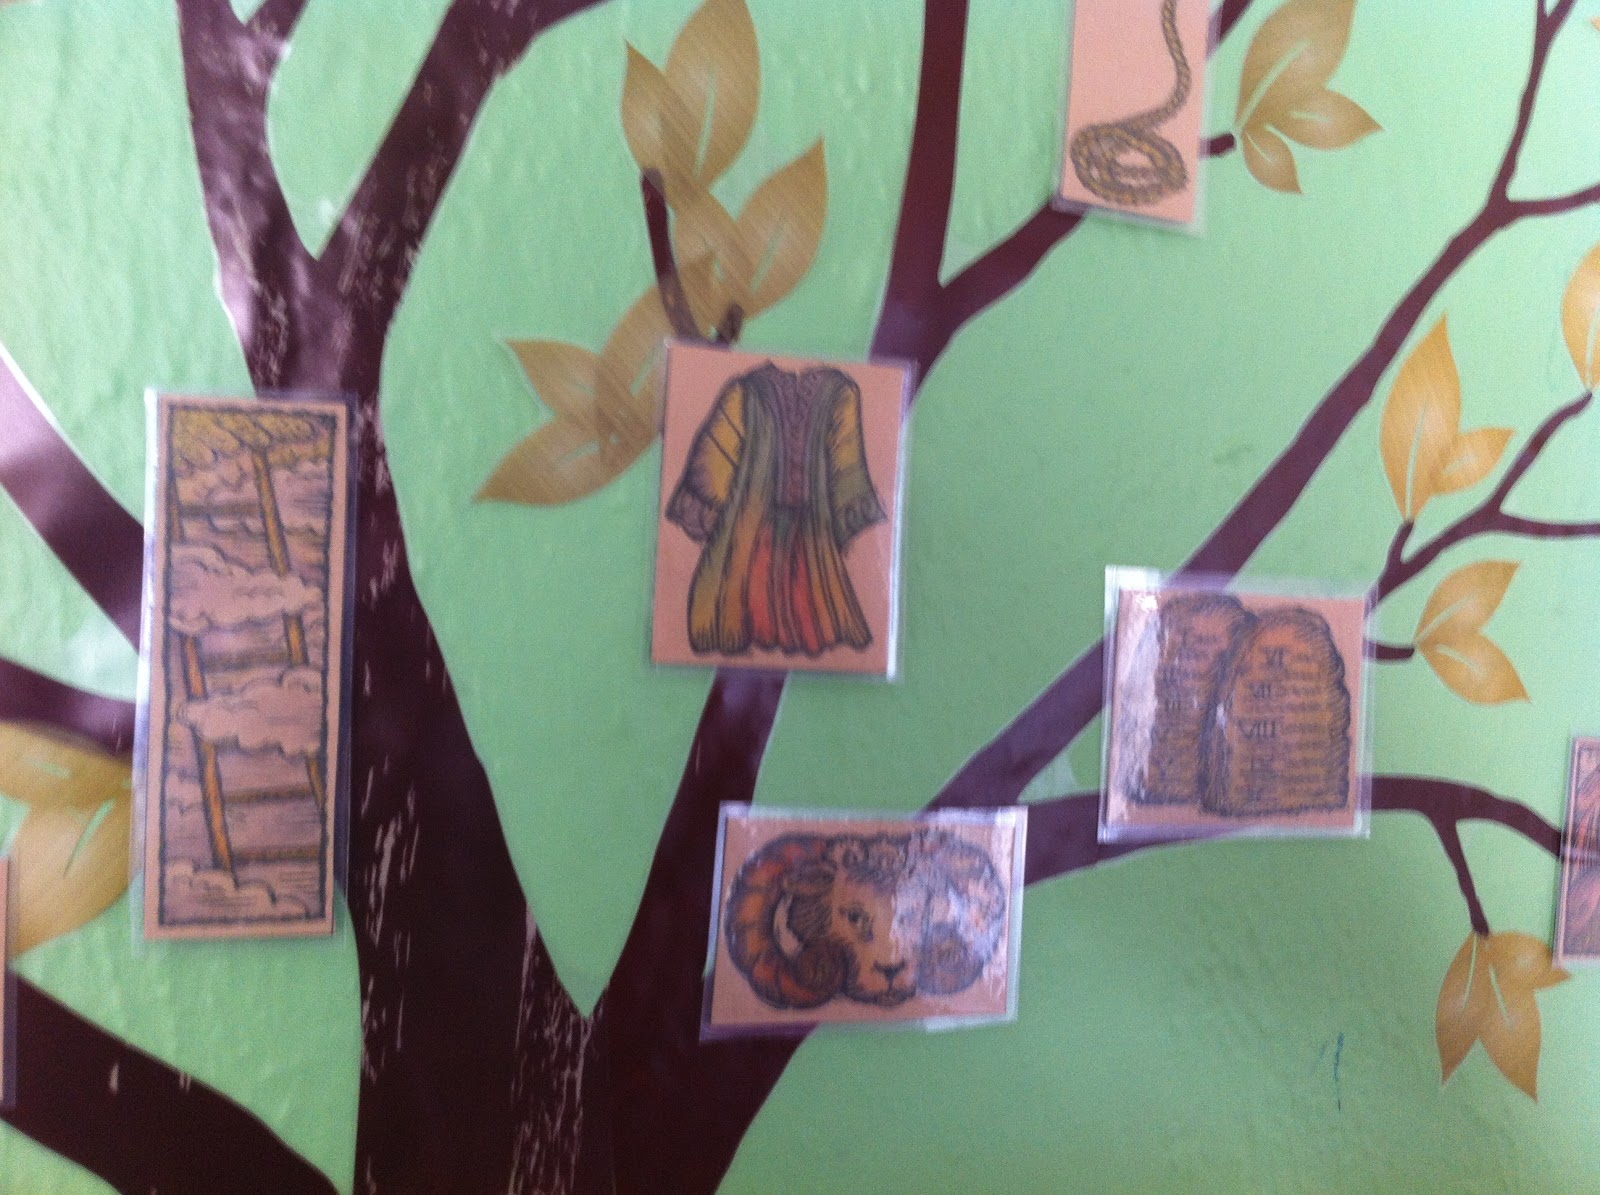
An up close of some of the ornaments - they seem to be holding up well so far!

That's it!  Jesse tree in progress.  Super easy and fun to do - you should be able to find the link on Ann's site if you'd like to give it a try, or I can send you the link myself!

Tuesday, December 6, 2011

First...

Well, here I am writing yet another blog. Truth be told, I've been trying a lot of new things lately (much in thanks to Pinterest) and have been wanting to share them with whoever will read about it.

So, I've started the blog called "Diversion Creation.". These crafts, recipes, etc. have been much like a diversion to me. You see, I'm nearing the end of my first semester of grad school, and the piles of homework never really seemed to go away. But even then, I needed breathers and ideas of ways to spend my time in between readings and assignments. I've been making a lot of Christmas gifts, which I'll share with you in the new year, after they've been gifted.

Here's one of my first creations this semester, a crocheted afghan made for my husband's cousin and his new wife. I tried to find the pattern I used online, but can't find it back unfortunately!  If I do, I'll update - it was so easy to do!